Those who follow our blog and travel on social media know that we try to make our experiences very visual to really showcase a place or its people and culture. Thus the photography and all that goes with it is an integral part of our journey.
Photography is of course my passion and now, along with this blog, my full time job and so unlike some other travel websites where photos are sourced from the web, all the photos here are taken by me.
I know you love the photography and we get lots of wonderful messages to that effect, but the most common question I get is the perennial ‘which camera do you use ’. Now whilst I am always at pains to explain that using a certain camera will not necessarily help you take better photos, for that you need to invest time and effort in improving your own skill and vision, I understand that for those jumping into the world of photography, what’s the best camera to buy is an important question.
It’s a question I have answered so many times, that I thought it might be helpful to put together a post on not only what best travel camera to use, but what other photography equipment I use in general and how they are all useful for travel photography.
For us and our style of travel, which is long periods on the road, living out of our backpacks and travelling on public transport the focus is always on how I can travel as light as possible and optimise the amount of gear I carry without compromising on anything I may need to get the best travel images
So lets get into everything I carry in our camera backpack from the camera and lenses to accessories and other tools which help us capture the kind of moments you see.
Camera
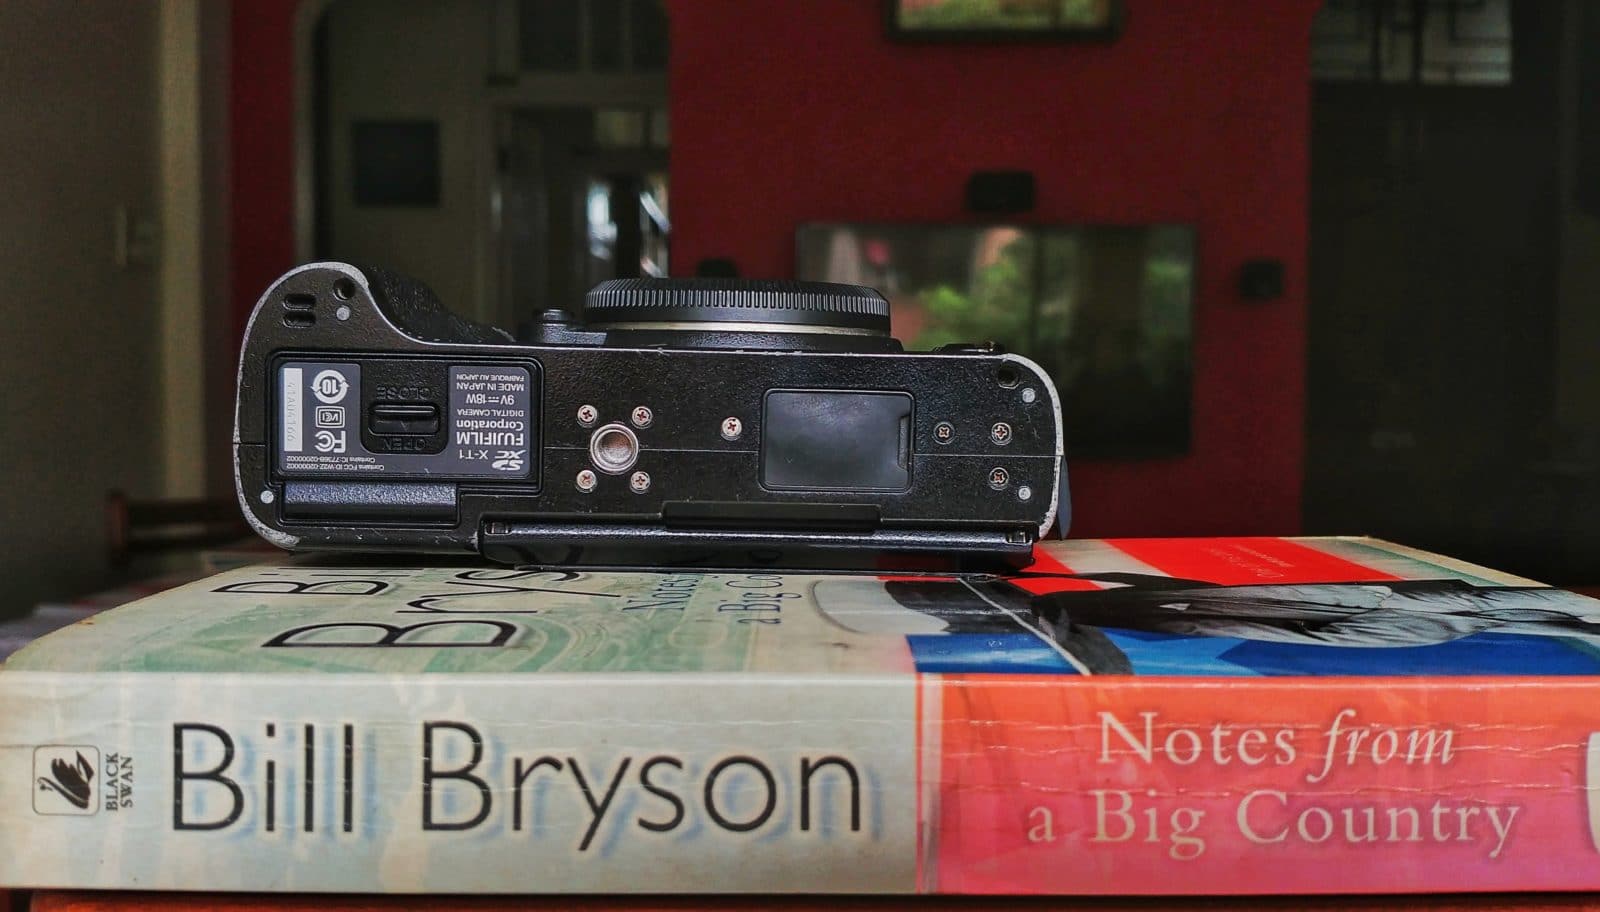
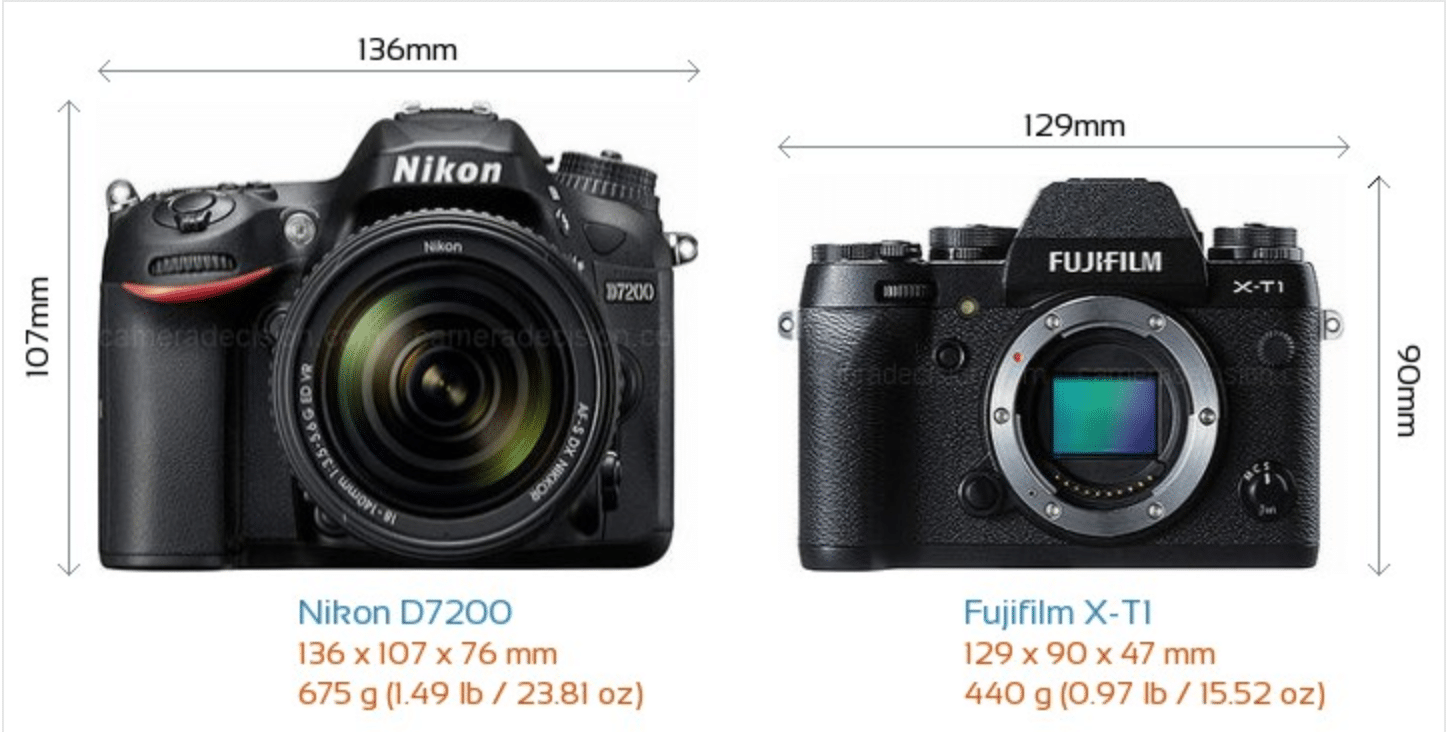
Our primary weapon of choice here is the Fujifilm XT-1. The excellent Fuji X Series line is a mirrorless – interchangeable lens system which uses the same APS-C size sensor that goes into mid-range DSLR bodies. Since sensor size is one of the biggest determinants of image quality, the Fuji can match if not exceed the image quality of midrange crop sensor bodies like the Nikon D7200 or Canon 80D
This offers many advantages: the primary one being DSLR level photo quality in a body that is significantly smaller and lighter. This means less weight in our bag and also the ability to be a lot more discrete and a lot less intimidating while shooting!
Add to that the weather sealed body, an excellent WYSIWYG viewfinder which allows you to see changes in exposure in real time (DSLRs can’t do this!), and the intuitive controls which allows you to change all major functions through dials and buttons (rather than diving into the menu) and the Fuji starts looking like the best travel camera out there.
The Fuji XT-1 is now more than 4 years old and Fujifilm has released the Fuji XT-2 which is the new flagship camera in the X Series line.
Lenses
It is said that more than camera bodies, the results you get will be determined by the lens you use and to a large extent that remains true. For travel photography which covers a wide range from portraits to landscapes and monuments and where weight of your kit is key, I believe the less number of lenses you carry the better. Keeping with this philosophy our bread and butter lens is the superb Fuji XF 16-55 F2.8. For me its the one lens to rule them all! Not only is the focal range very versatile, but the constant 2.8 aperture makes it usable even when the light starts dipping or when you need some nice shallow depth of field.
I take almost 95% of our shots on this lens and though its a bit expensive its super sharp, sturdy, weather sealed and will probably outlive my camera body, all of which makes it a worthwhile investment.
While the 16-55 2.8 is good for *most* scenarios, to make sure I am prepared for all possibilities and situations I also carry the solid and sharp Fuji XF 55-200 and the wide angle Samyang 12mm 2.0 both which get reasonable use.
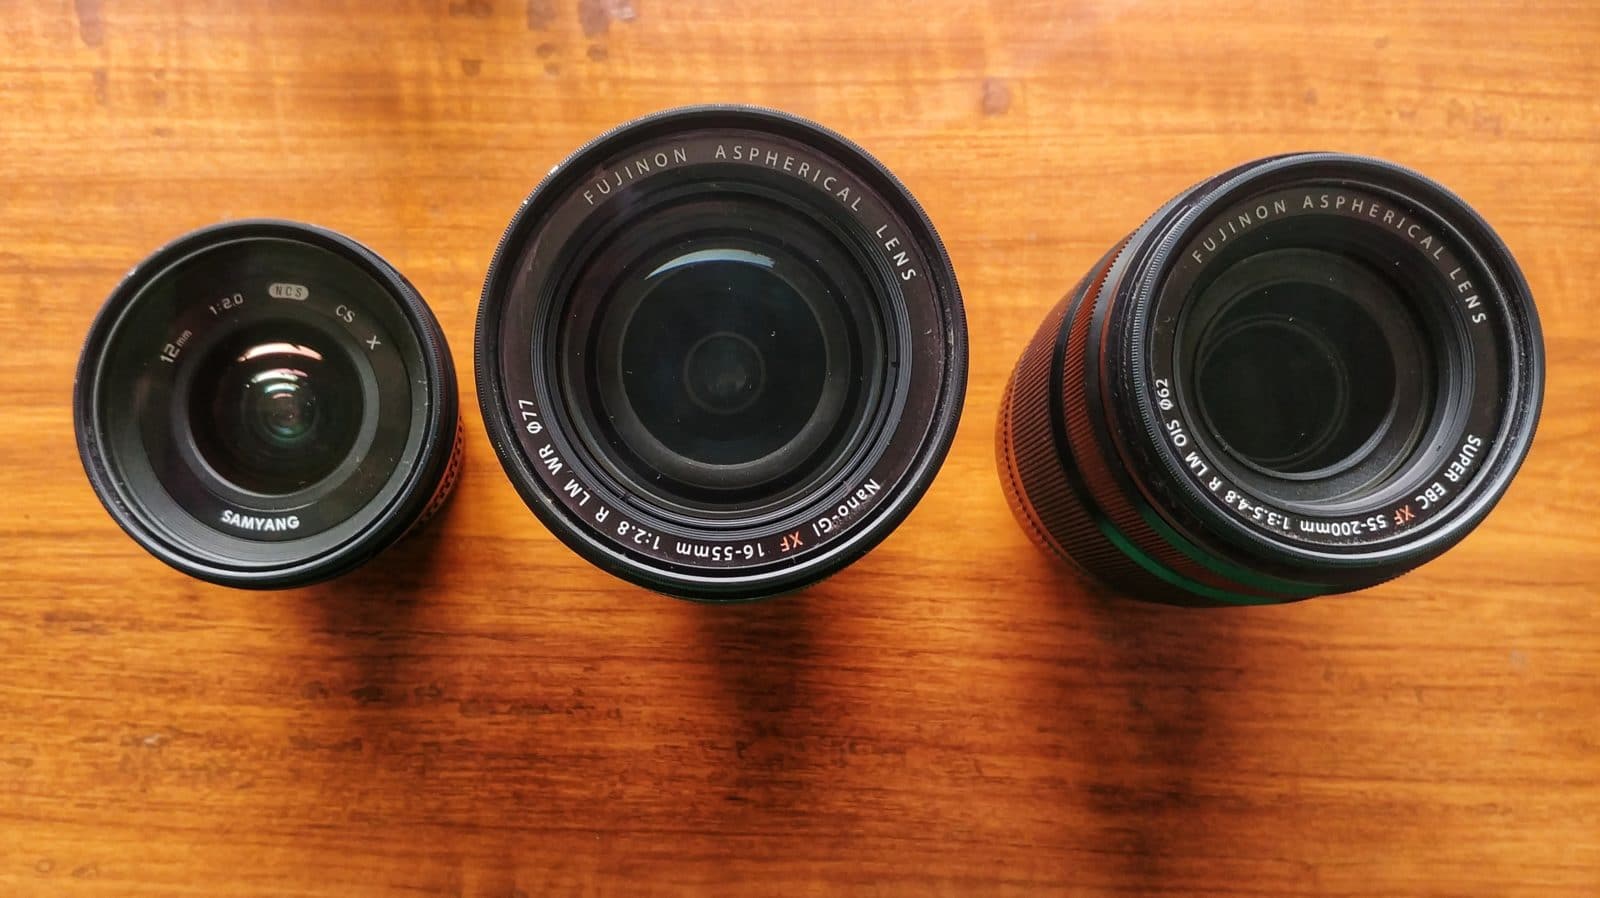
The Fuji 55-200 is used mainly for wildlife photography and the occasional portrait and detail shot, whilst the Samyang is used mainly for architecture and Astro photography.
The Samyang particularly is a great buy because it’s super sharp, small, light, goes down to f2.0 and is pretty cheap to boot!
Tripod
If you are looking to do Astrophotography or long exposures in landscapes a camera tripod is a must and this where your photography equipment can start getting cumbersome. As with all the other travel photography equipment I carry, with the tripod as well my focus was on something that was lightweight and versatile.
Enter the MeFoto Travel Tripod. This unique travel tripod will hold your expensive and heavy photo gear as securely as larger options from brands like Manfrotto would, and are lighter, smaller and cheaper!
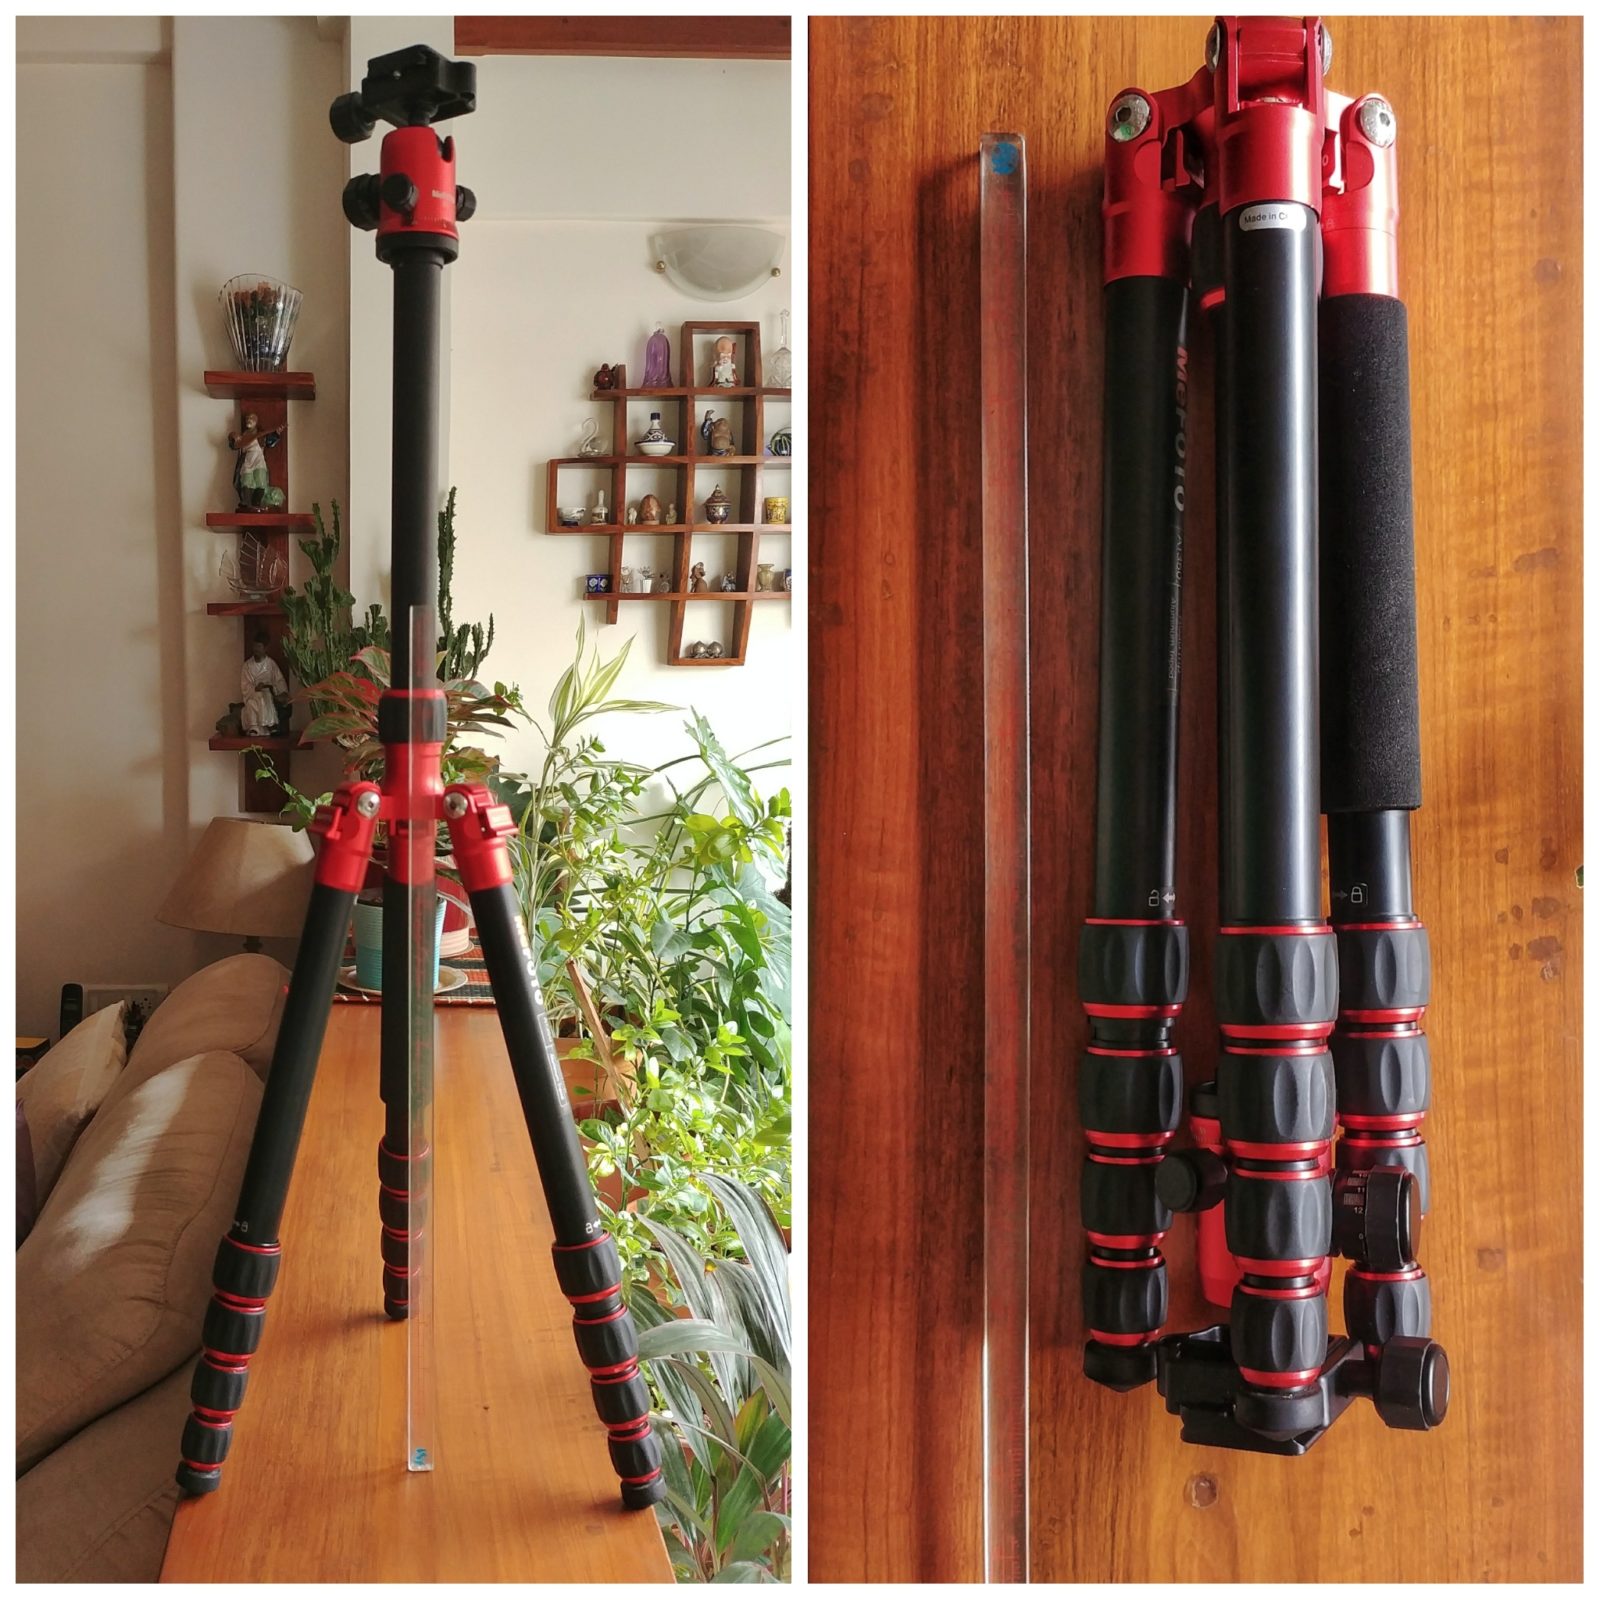
What makes it so travel friendly is the design of the tripod legs which fold when it is packed making the form factor significantly smaller without compromising on the height to which the legs can be extended. What is also really cool about the Mefoto is that you can detach one leg and use it as a Monopod! Awesome!
A recent addition to our kit is the cute little Manfrotto Pixi Mini tripod which is super to just shove in your bag for situations where you probably wont need a tripod but want an option along just in case! Its also super useful for those self portraits of you pensively gazing in the distance with a beautiful background! 😉
Computer & External Hard Drive
This is not so much photography equipment, but it forms an essential part of the arsenal of any travel photographer. Its main utility is to backup your precious photos and to do a little bit of editing on the go. Not going to talk much about this, but for our computing needs our pick is the 13” Inch MacBook Pro. Something like the MacBook Air is definitely a tad bit lighter but the MacBook Pro has more ports and that lovely retina screen, which makes the extra weight worthwhile.
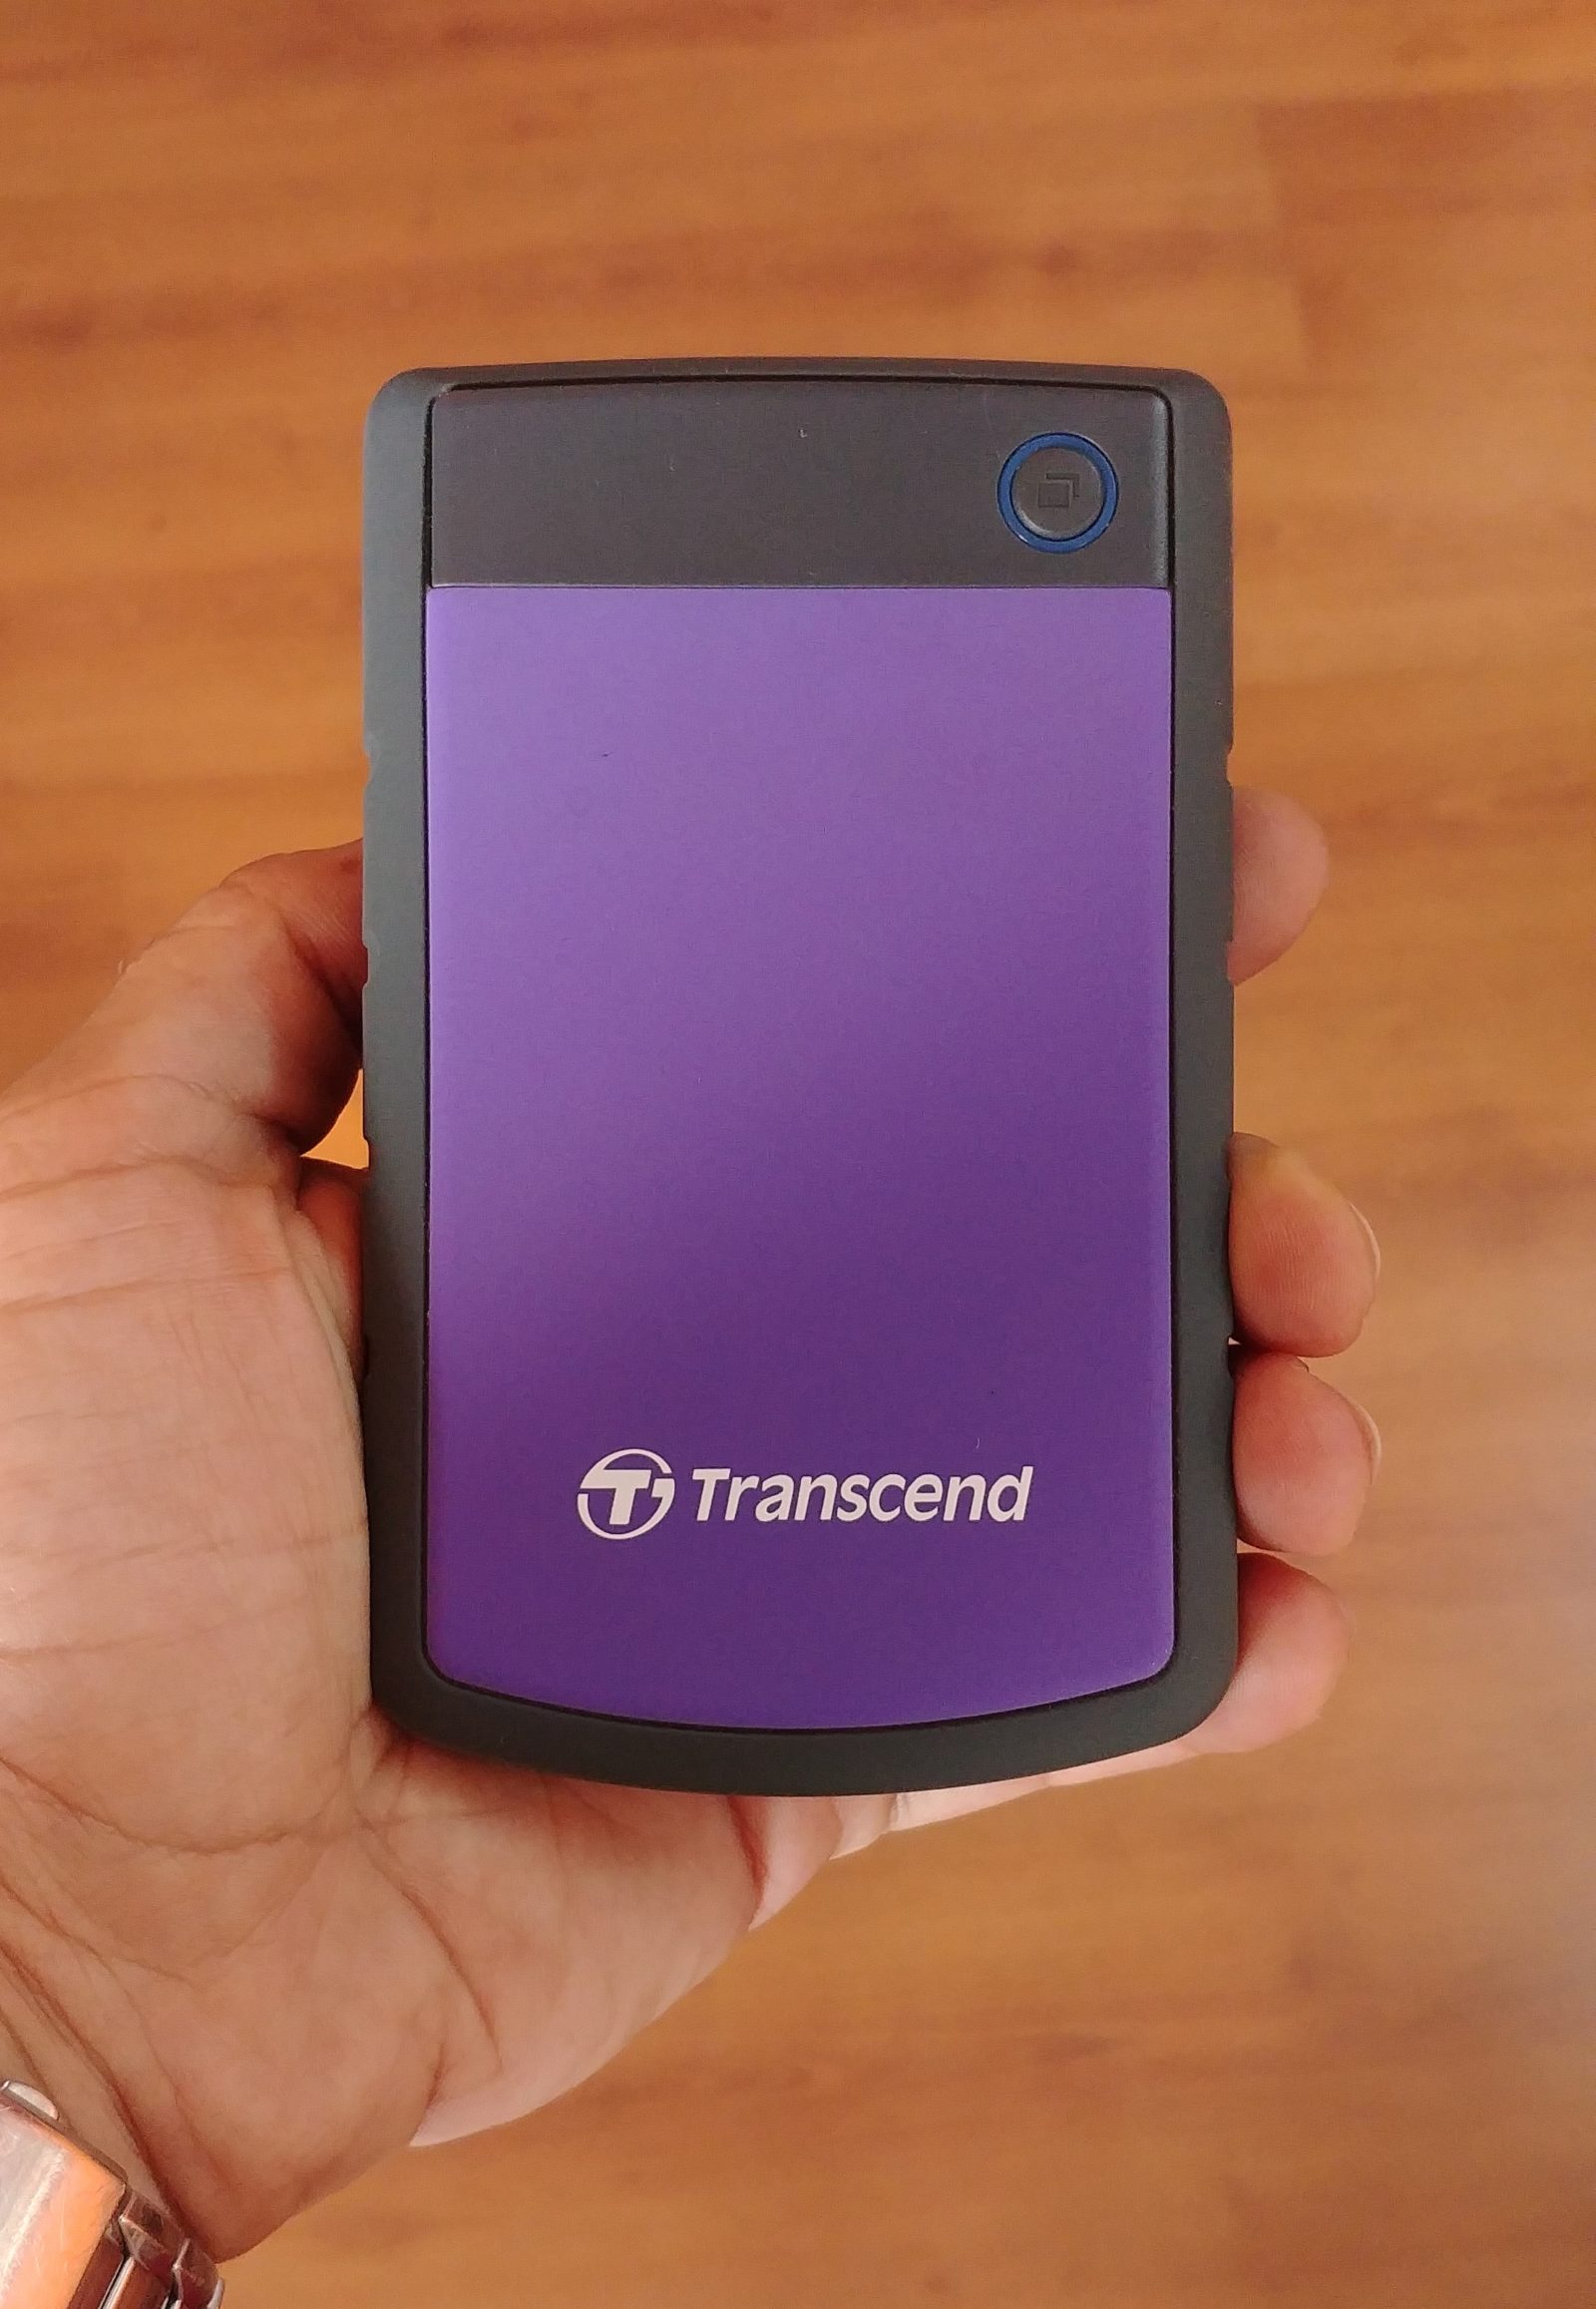
Don’t underestimate your backup needs, there’s nothing worse than coming back from a day of shooting to find your SD Card corrupt or inaccessible. To avoid these situations, I usually backup my photos to an external hard drive every couple of days. For backups I use the 2TB Transcend StoreJet which boasts a nice rubberised case for shock protection from drops.
Camera Bag
As you can see, all the equipment is slowly adding up and so having a good backup to carry all your equipment safely and comfortably is of paramount importance.
After going through a number of Camera bag options, I finally settled on the LowePro BP 150, and here is why.
When looking for a backpack, these are the 5 things I need.
- Something that protects my gear to the extent practically possible from dust, water and impact damage,
- Something that is comfortable to carry through the day and on long journeys,
- Something that packs in a fair bit of gear without being unwieldy and large, which can be subjective of course,
- Something that leaves both my hands free and sits stable on the back without feeling cumbersome,
- Most importantly, something that allows me to quickly and easily access my gear for lens changes / card changes / battery changes etc.
I used to carry a Vanguard Sydney II messenger style shoulder bag which served me well when I had a single body and 3 lenses with only a few odds and ends. But as the amount of stuff I carry grew, it became impractical and also uncomfortable to carry. The other issue with that is the one shoulder option is not always practical outside of confined spaces or controlled situation, or while on a trek for example.
I resisted using a traditional backpack because changing lenses on the go would usually mean removing the bag from your back and placing it on the ground to open it before getting access to your gear. Too slow.
I used a CaseLogic DC 308 sling backpack for a while which has a single strap across the chest which allows you to sling it around and access your gear quickly form a side pocket. That worked well for access but was too uncomfortable to carry around for a full day and couldn’t hold all my gear.
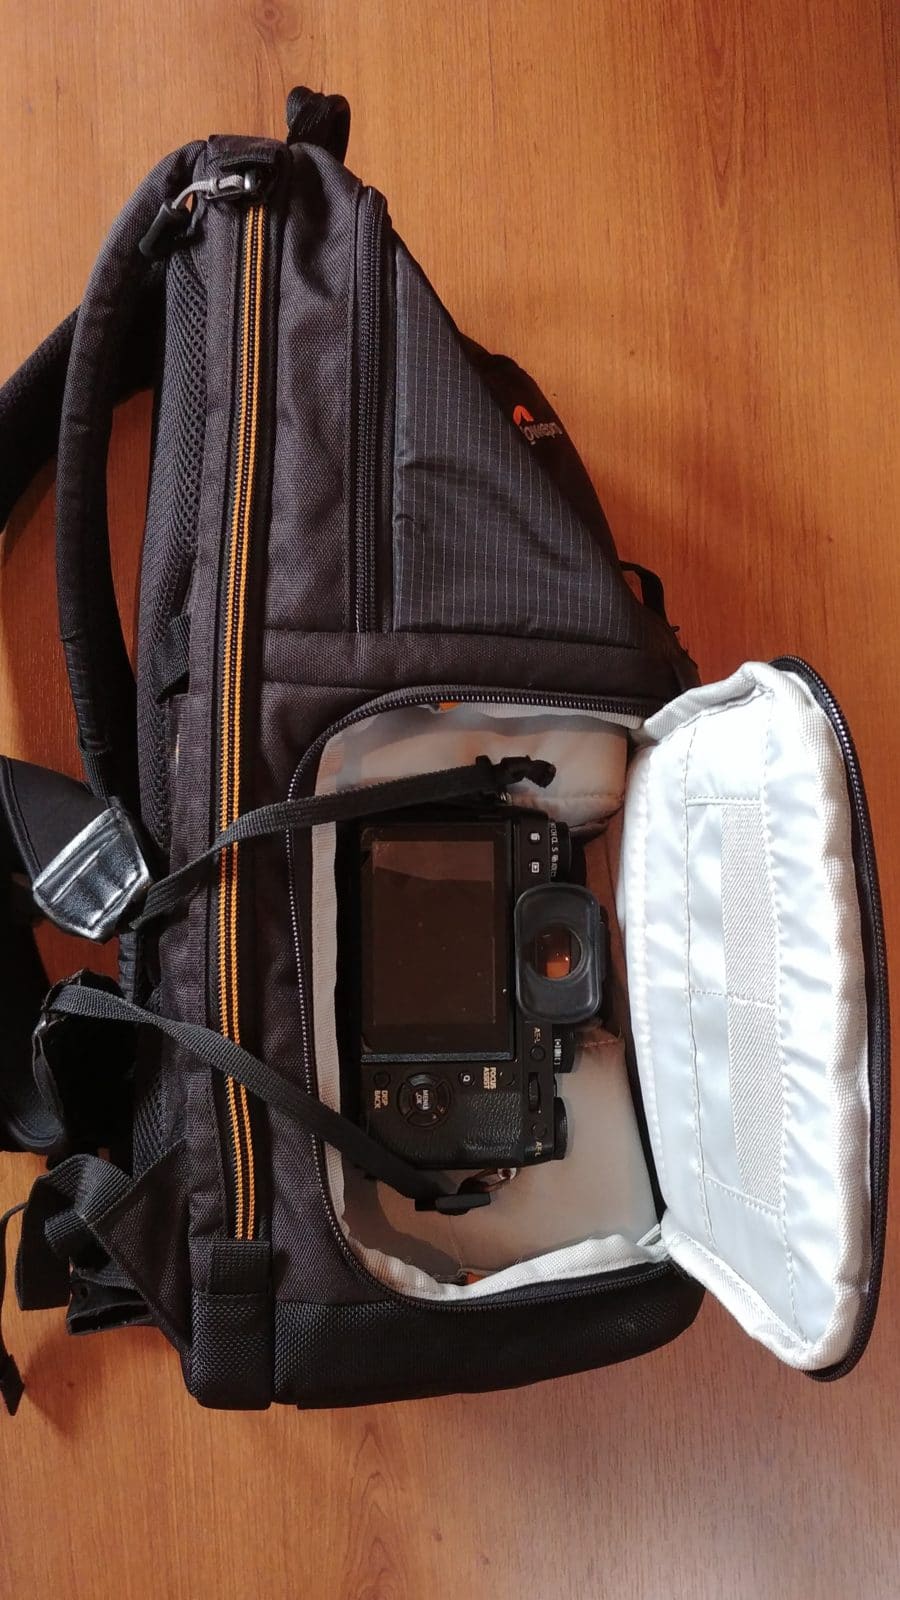
Enter the LowePro BP 150 which meets almost all of my requirements.
Its a traditional backpack with one key difference. It has a side access pocket which allows for quick access where you can pull out your gear without removing the bag from your back. This has proven to be the best compromise for me between comfort and utility. Plus its large enough to carry all my gear mentioned above (and then some) whilst still being reasonably compact and even has a sleeve for my 13” MacBook Pro!
Accessories
Besides the stuff mentioned above I carry a number of odds and ends which are not everyday shooting items but are quite useful whilst executing certain types of shots:
External Light: The little Lume Cube is a cube shaped light which is about 2 x 2 x 2 inches and weighs less than 100 grams, but is super powerful. Its useful for lighting up a subject while taking portraits, lighting up the foreground in a Milky way photo or even to use as a constant light for video. Plus its weather sealed and has a pretty decent battery life. There are some photos which we absolutely wouldn’t have been able to take without this little beauty.
Camera Remote: This is a wired remote which is attached to a USB mini port in the camera and can fire your shutter. Useful when your camera is mounted on the tripod and you absolutely don’t want to risk a slight shake by pressing the shutter button. Best used during Landscapes and Astrophotography shots.
Variable ND Filter: Super useful whilst taking long exposures in the day to reduce the amount of light that enters the camera (thus allowing you to keep your shutter open longer without blowing the image). There are some pretty shitty ones out there. I use one from Tiffen which is pretty good but a tad pricey. If you have a number of different lenses, a cheap if slightly fiddly solution is to buy an ND filter which fits your largest len and then use step down rings for other lenses. For eg. My Tiffen is a 77mm thread size to fit the 16-55 2.8 lens, but with step down rings I can use it on my wide angle Samyang 12mm lens as well.
Now get out there and make some great photos! 🙂
Extremely useful information…. Thanks guys 🙂
Thanks, glad you found it useful!
Extremely useful information…. Thanks
thank you! 🙂
Useful
Thanks Unnikrishnan, glad you found it useful! 🙂